Dashboard
View an overview of your application here. You can find two different dashboard from admin view and user view.
In User Dashboard
- View your completion overview.
- View your document overview.

In Admin Dashboard
- View all user's completion overview.
- View all user's document overview.
- View total user summary, active users, deactivate users, invited users.
- View top 3 token consumer
- View top 3 documenter

AI features
Generate ai based contents by openai.
Templates
The templates view gives you a list of templates to start from before composing your document. You also have the ability to mark templates as favorite which will then be sorted at the top. Click a template of your choice and you will be redirected to the content writing form with the said template selected.

Text Generate
The text generating view allows you to generate text based on your configured settings. Enter the information related to your desired text on the left panel and click 'Generate Text' and BrainBox will generate text based on your given information on the right panel. You can modify the generated text to your liking then use it as it is or save as document.

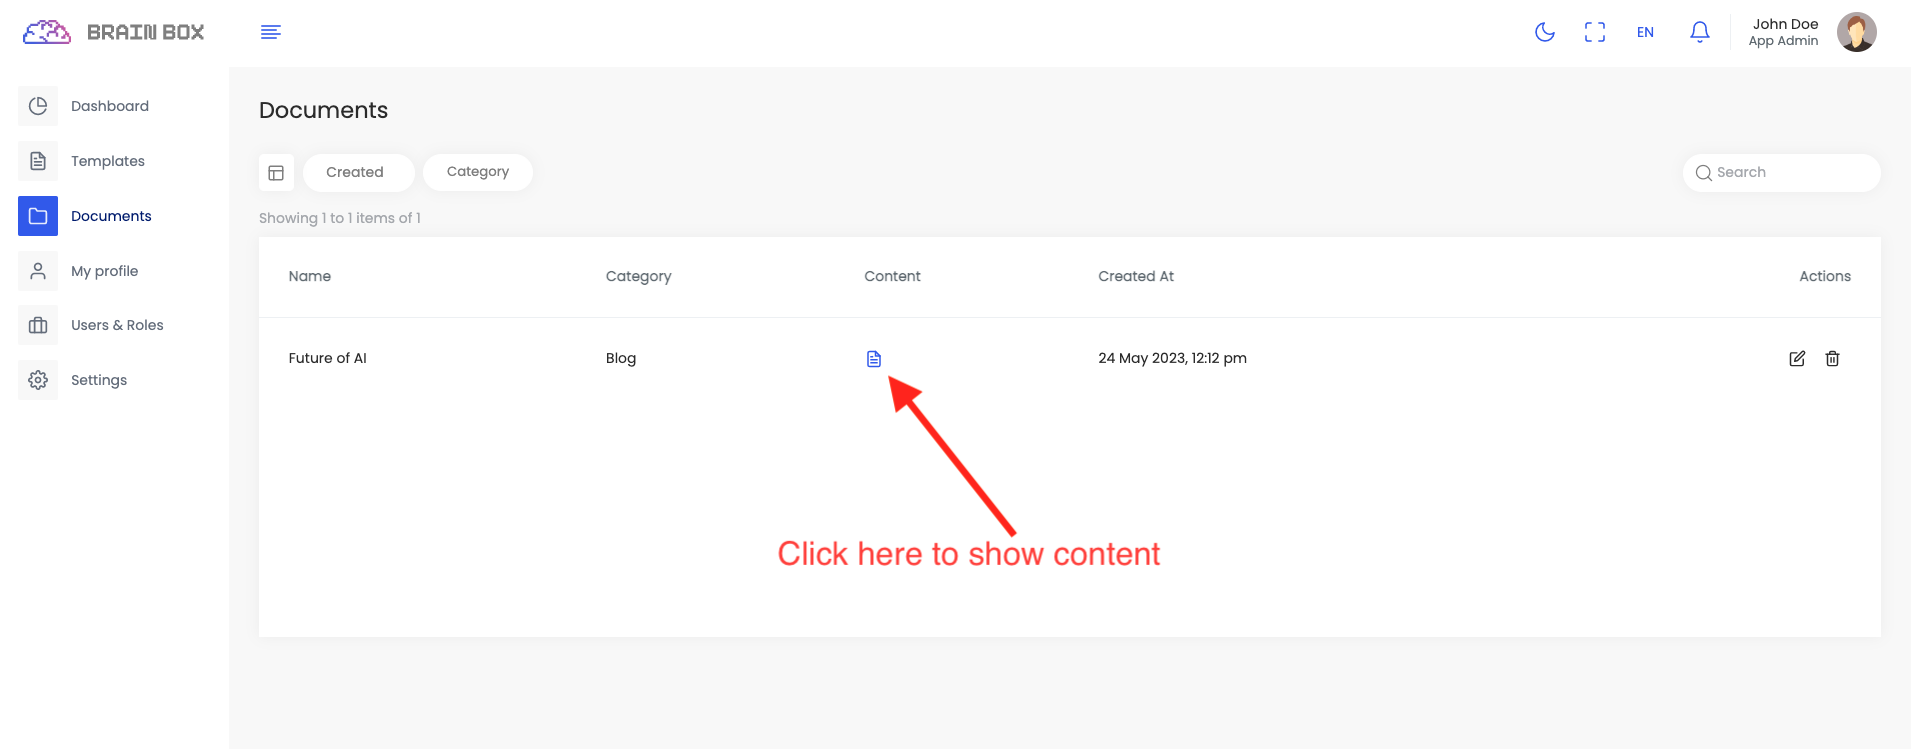
Documents
Here you will see all the documents you have saved. You can edit or delete documents as you like.
My Profile
View an overview of your profile here. Also you can change and update profile.


Users & Roles
Users and Roles is an important feature in any application. You may need different roles for different job.
-
Users and Roles is an important feature in any application. You may need different roles for different job.
By default there are two role available to manage the app.
- App Admin: Can access and manage the whole app.
- User: Has limited permission to be an user of the organization.
-
You can manage users of any role by clicking on Manage User of that specific role from Action column.

-
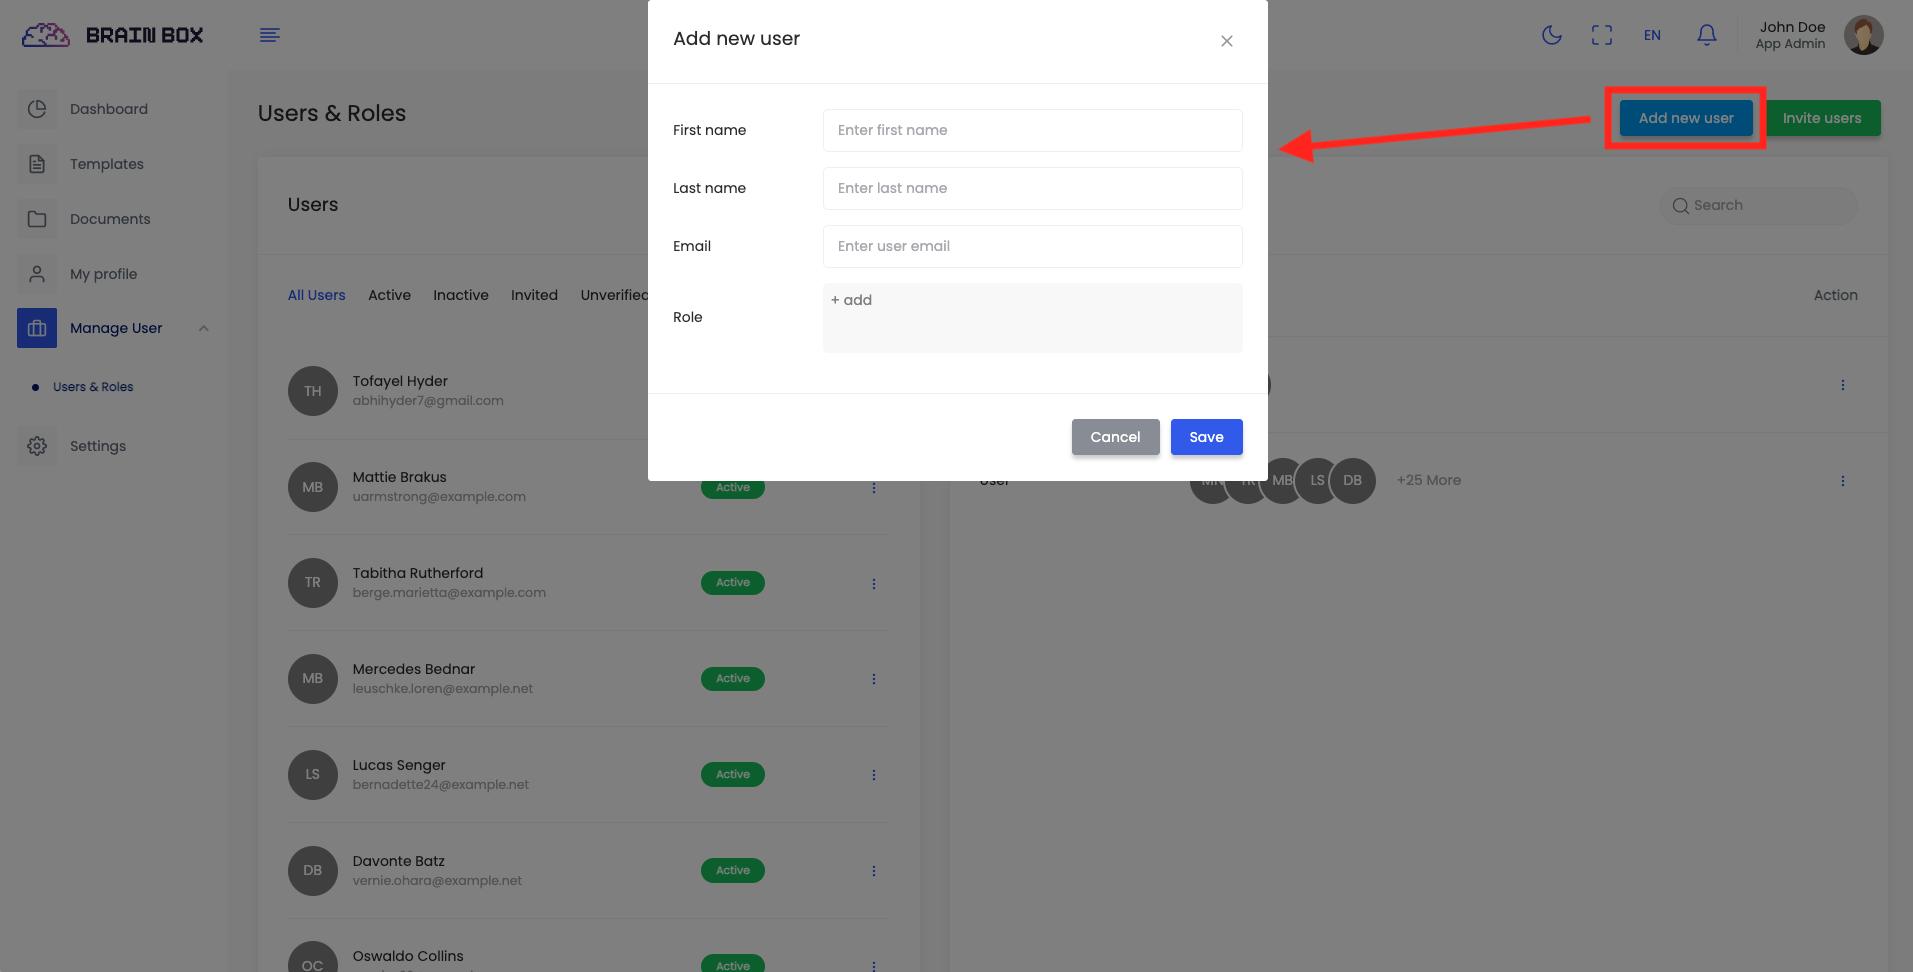
Click on Add new user, It will open a modal that requires user first name, last name, email, and role that will be assigned to that user. Added user will get an confirmation email with a link. That link will redirect to a page where user can signup and set their basic information.
-
Click on Invite User, It will open a modal that requires user email, and role that will be assigned to that user. Invited user will get an confirmation email with a link. That link will redirect to a page where user can signup and set their basic information.

-
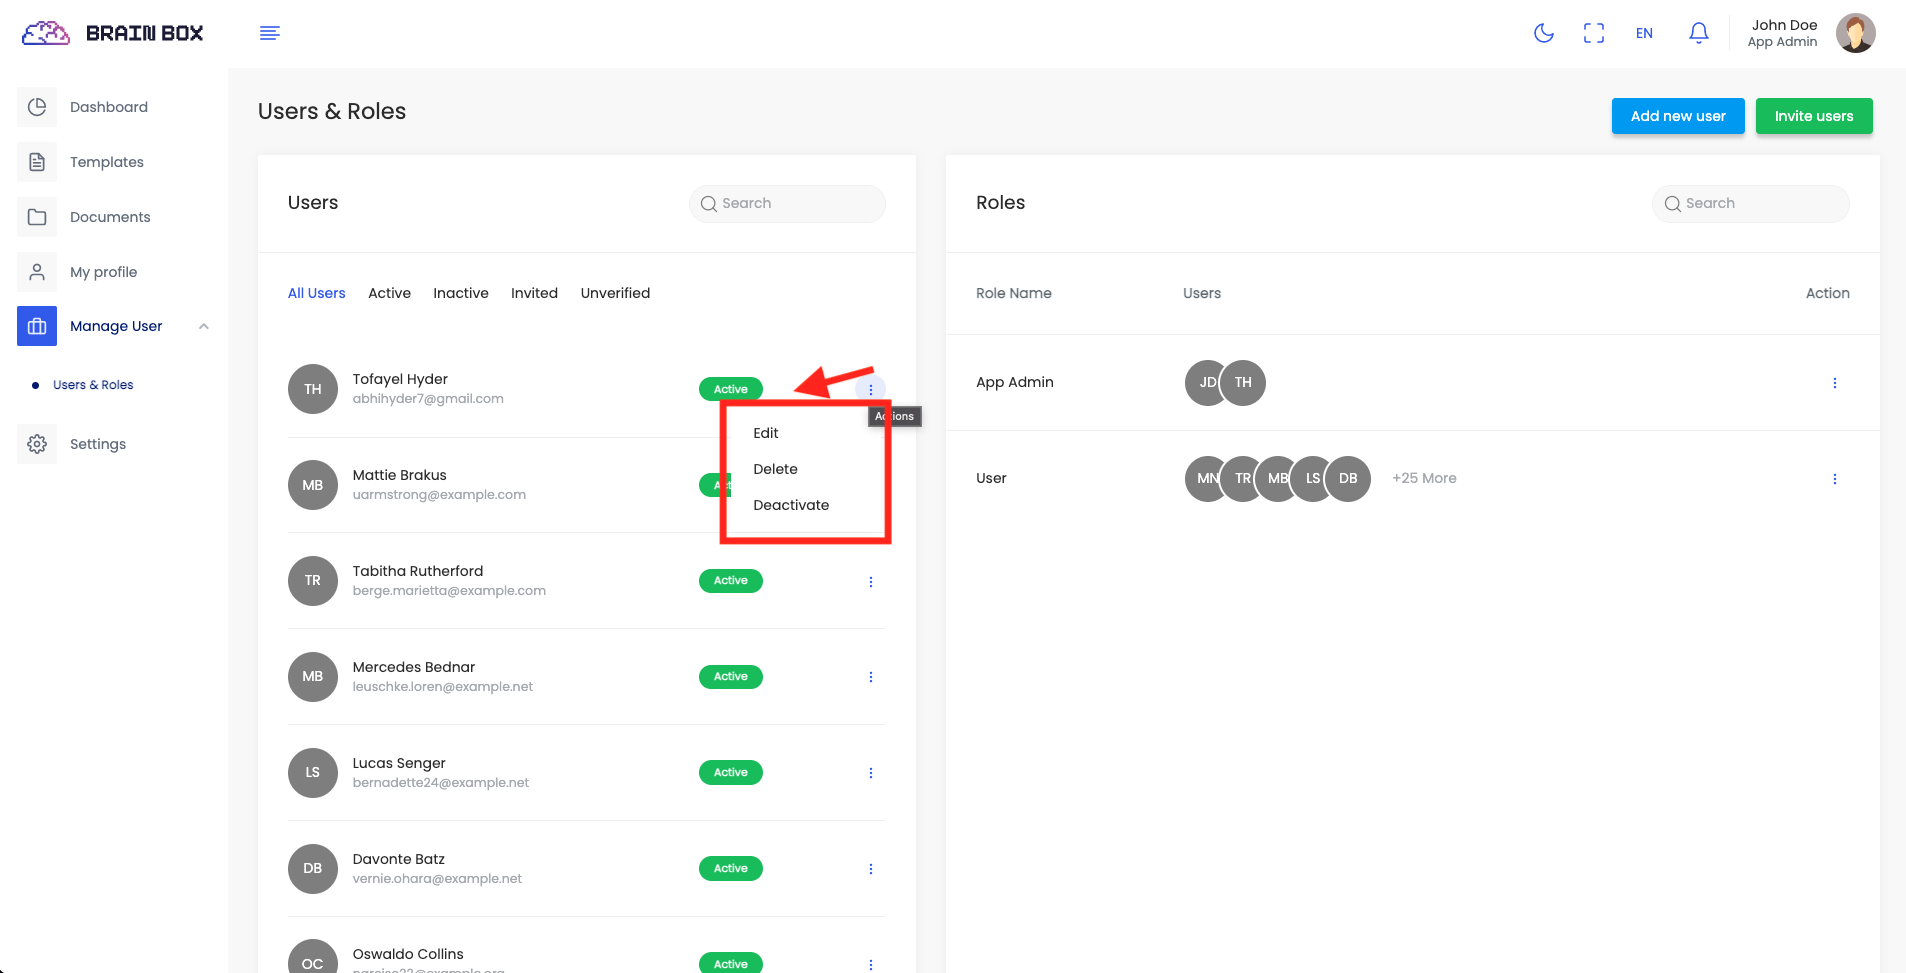
You can change user status, manage roles, edit and delete of specific users.
Settings
For the efficiency and better user experience of the application we offer some custom settings options for the user. Here you can set different type of settings based on the need of your organization.
Application settings
Settings related settings are listed bellow
-
General settings
-
Go to "Settings" > "General"
-
You can set your Company name.
-
Company logo is used in you application. Select image of your logo.
-
Upload an icon as Company icon of the application.
-
Upload your Company banner of the application.
-
Change suitable Language for application.
-
Set Address Details of your company
-
Set Date and Time format and Timezone the way you want to see date/time in your application.
-
Turn on/off Sign up for your company user
-

-
-
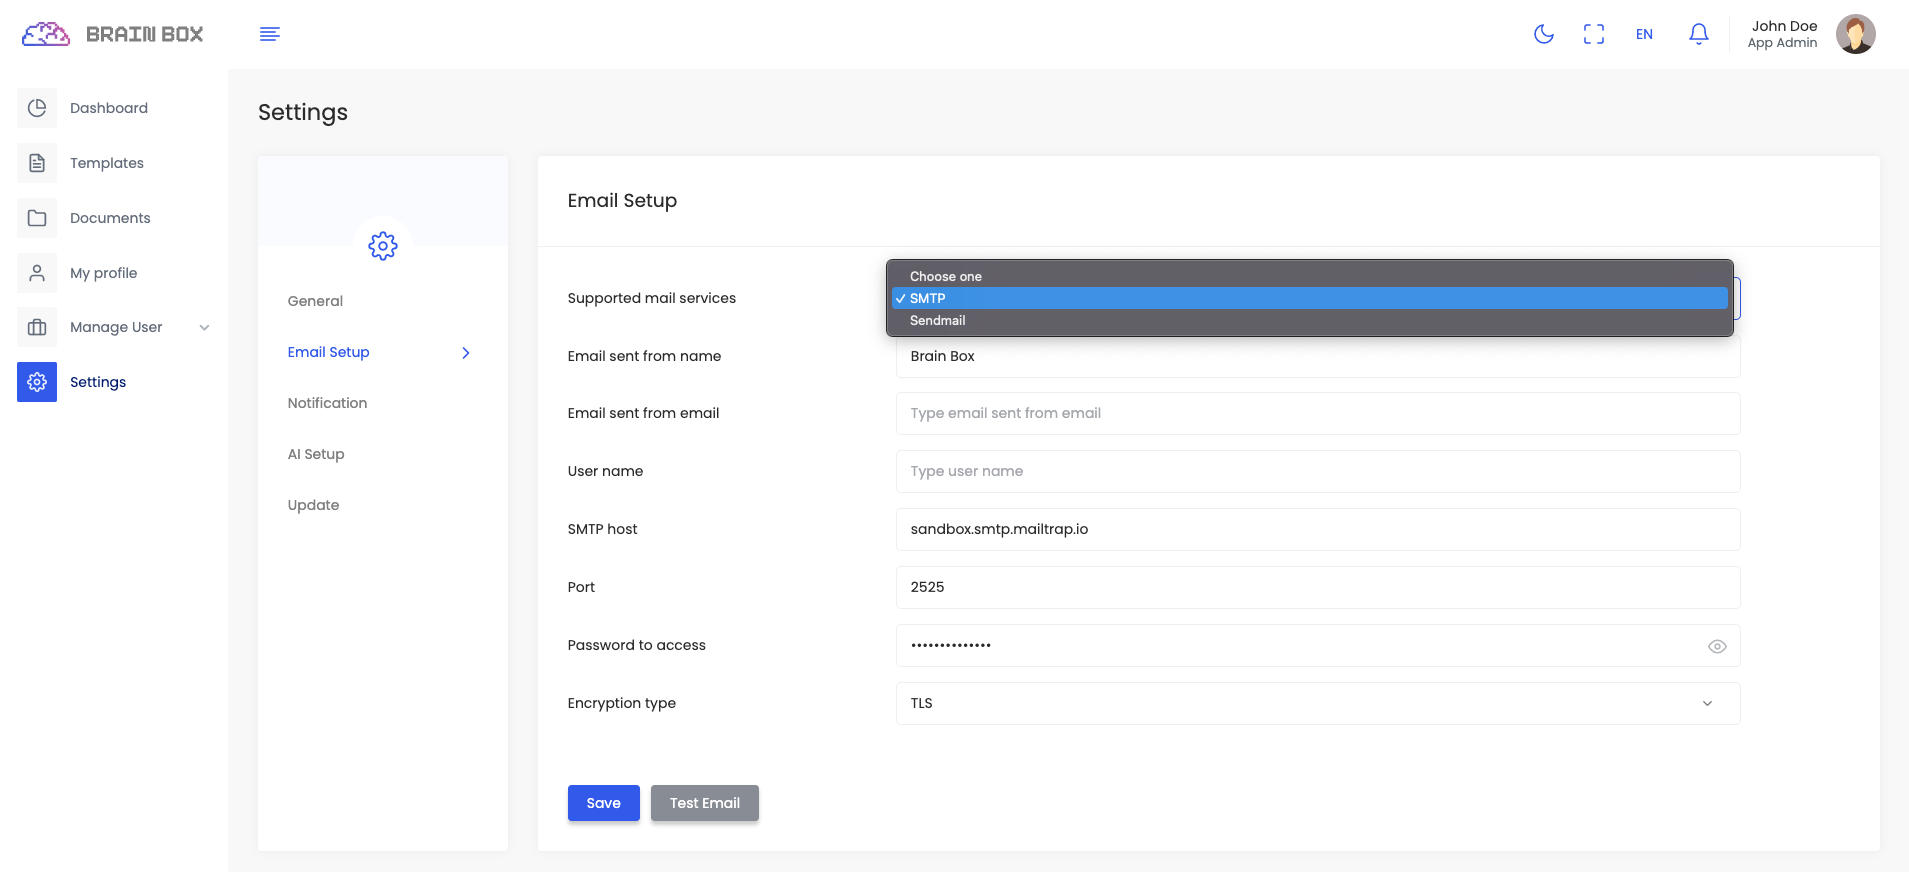
Mail settings
App level configuration will be used for app related processing. For example inviting user, password reset email, Notification etc.
-
Go to "Settings" > "Email Setup"
-
-
Notification settings
-
You can update settings from here and also can update the template of notification. You have the following options.
-
You can set channels where the notification will send.
-
You can set / choose users who will be notified on selected events.
-
You can set / choose roles to set these audiences under that roles to get notified.

-
You can set up the template for the notification by clicking the Update Button

When updating template to insert tag into template you have to click on the tag to insert. But for something like url or image you have add them from editor menu. From above screenshot if you want to add the {resource_url} tag to the template. Click on the link option and add it in second input. Add your link header in first input. For {app_logo}, Click on picture from editor menu and add this to the input box
-
-
-
OpenAI Setup
Configure OpenAI related settings. Enter your openAI credentials and other info. You can set daily genaration limit and token usage limit for user.
-
Go to "Settings" > "OpenAI Setup"

-